Introduction
This method is no longer advised by us and therefore the documentation might not be to date, but kept published for posterity.
This article will guide you through the steps to setup Microsoft TEAMS without setting up a direct routing SBC in the own tenant. Instead a so-called carrier tenant will be used.
Requirements
- A peoplefone Account (Registration)
- A Microsoft 365 account with:
- Microsoft 365 Business Essential, Premium or M365 Business with the add-on license Microsoft 365 Business Voice; or
- Microsoft 365 Enterprise E1 / E3 with the Add-Ons Phone System and Audio Conferencing; or
- Microsoft 365 Enterprise E5
How-to configure direct routing
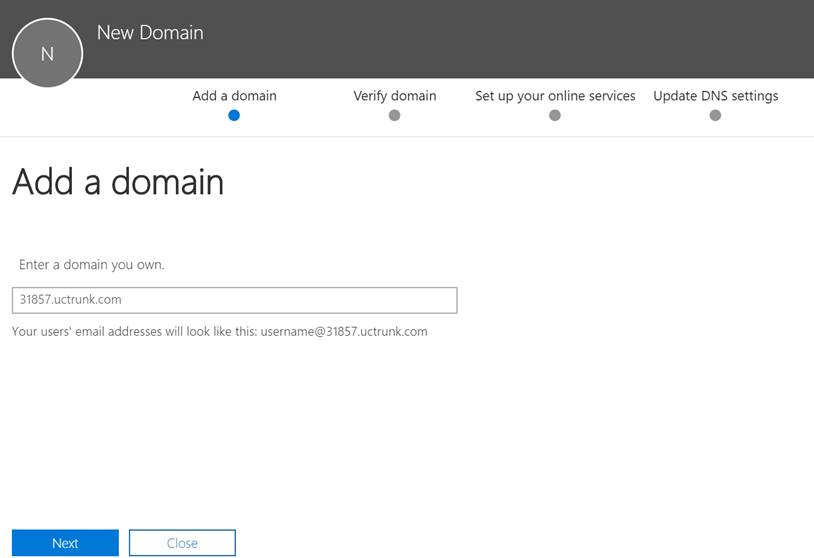
Set up of the domain, step 1
- During the onboarding process, peoplefone will assign you a specific domain that must be configured in your O365 account.
To configure them, go to your O365 portal, select on the left menu Setup → Domain and select Add domain

- Enter the domain that you received from peoplefone (in this example 31857.uctrunk.com)
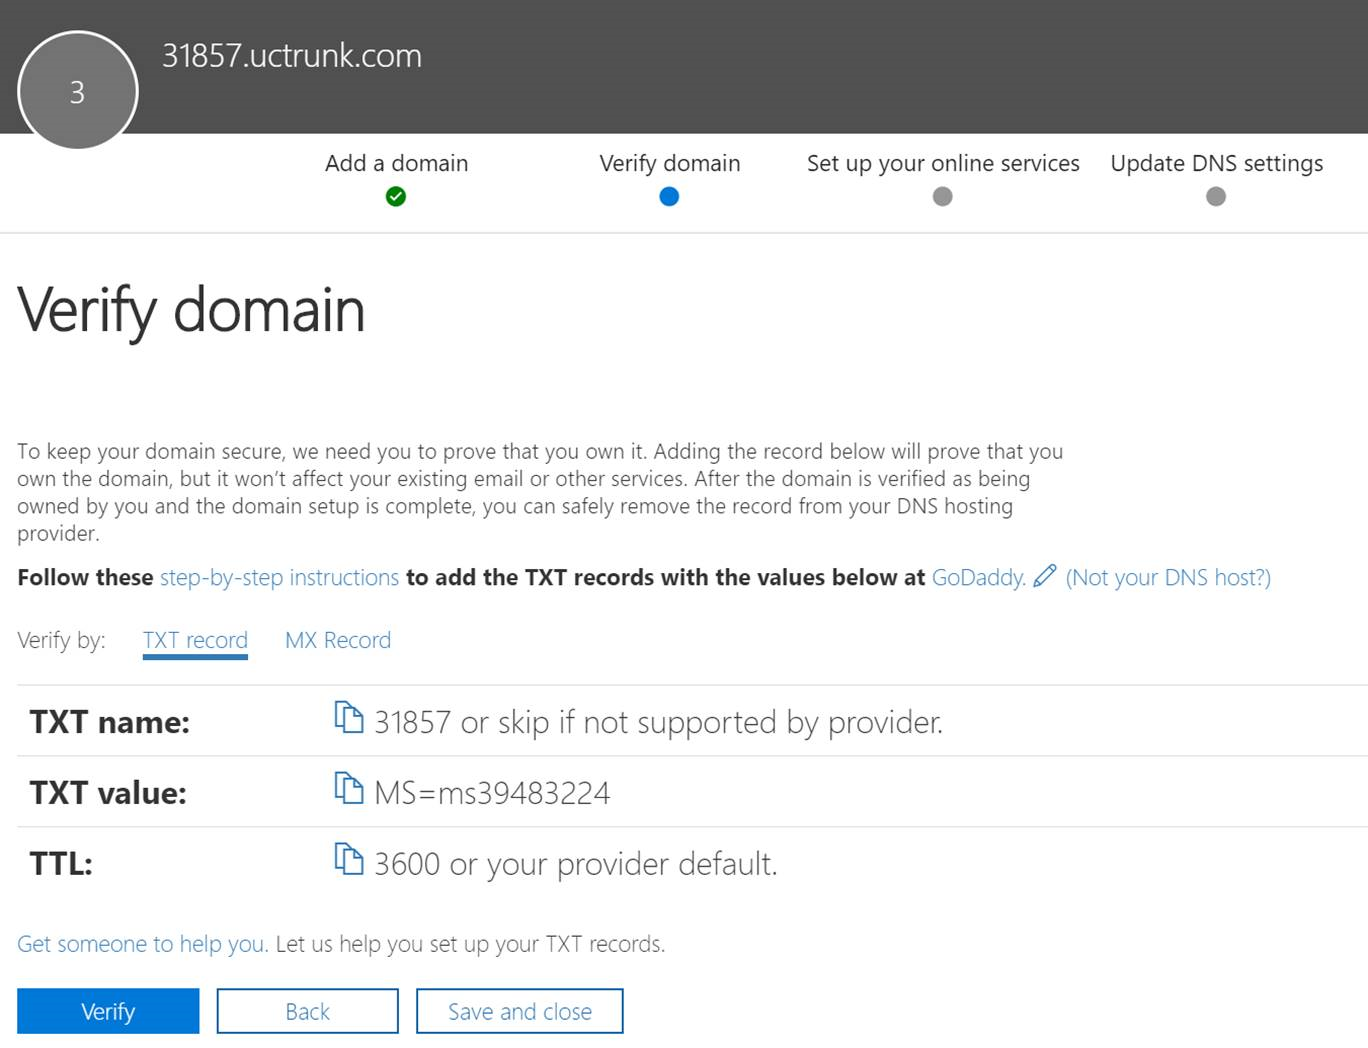
- Select “Add a TXT record instead”
- Copy-paste this screen and send it back to peoplefone so they can setup the validation
Set up of the domain, step 2
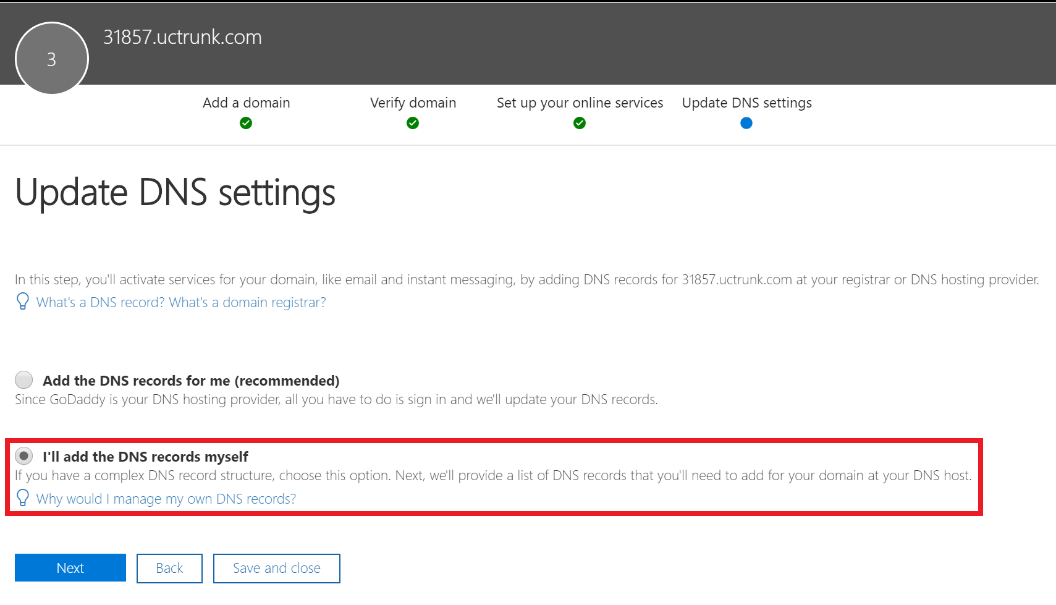
- When you receive the confirmation that the TXT verification is ready from peoplefone, you must go back to this domain set up and start the verification process.
After that you must select “I’ll add the DNS records myself”
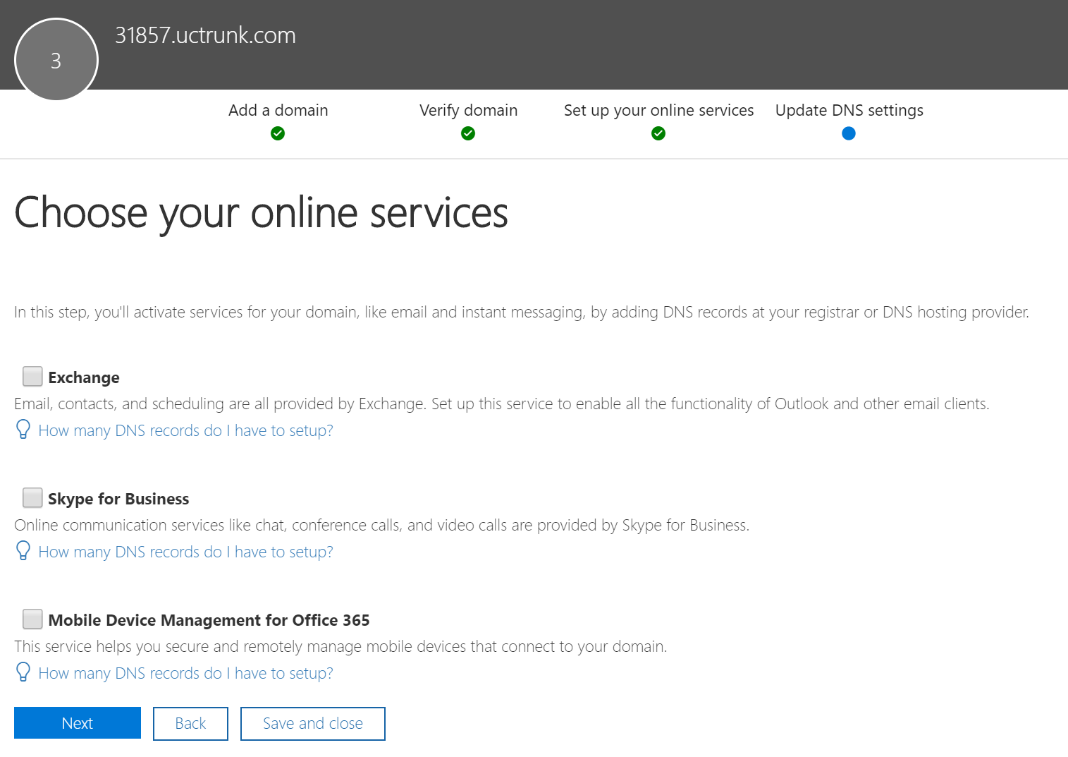
- Disable all services and click Next
- The domain should now be ready
Activation of the domain
- Once the domain setups are completed, the next step is to activate them.
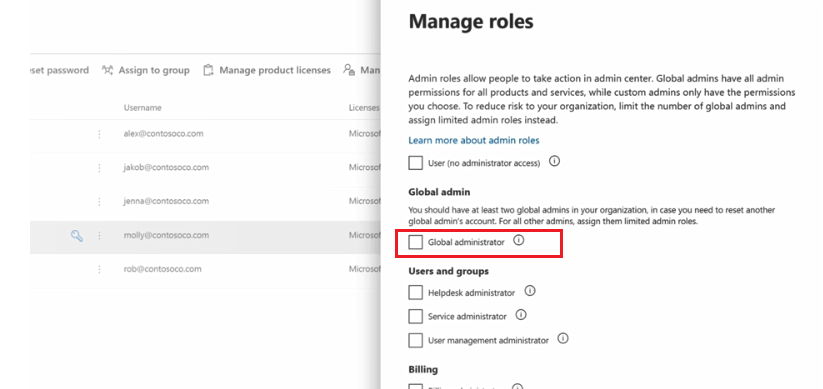
For this, we will need to add a “dummy” user (with a E3 or E5 license) to this specific domain, not the default one.
When the setup is completed you can delete this “dummy” user. IMPORTANT: This user must have the global admin role

Voice Routing Configuration
Please note, that enabling the rules you configure on Microsoft’s pages via PowerShell can take up to 72 hours.
This How-To covers the setup for a simple solution where only Teams is enabled as communication solution in your O365 account.
If you have or plan to have a hybrid solution with Teams and Skype for Business online or Skype, then you will need to select more parameters.
More information on:
https://docs.microsoft.com/en-us/microsoftteams/direct-routing-plan
https://docs.microsoft.com/en-us/microsoftteams/direct-routing-configure
Before starting this setup, verify that you have received the following information from peoplefone:
sbc_domain: 31857.uctrunk.com
For this setup you will need PowerShell with the Skype Online Connector.
The following link will provide you all information on how to install them: https://docs.microsoft.com/fr-fr/SkypeForBusiness/set-up-your-computer-for-windows-powershell/set-up-your-computer-for-windows-powershell
- When the PowerShell is ready, install and update the Microsoft Teams module
Install-Module MicrosoftTeams
Update-Module MicrosoftTeams
- Then enter the credentials of the user you created for the setup:
$credential = Get-Credential
- Then connect by entering your credentials:
Connect-MicrosoftTeams -Credential $credential
- Create and load the session:
$session = New-CsOnlineSession -Credential $credential
Import-PsSession $session
Verify whether the user is registered in Skype for Business Online:
Get-CsOnlineUser -Identity “<User name>” | fl RegistrarPool
You must then receive a non-empty location.
Now create the PSTN gateway:
Set-CSOnlinePstnUsage -Identity Global -Usage @{Add="TeamsVoice"}
- Then the voice routing :
New-CSOnlineVoiceRoute -Identity "Default Route" -NumberPattern ".*"-OnlinePstnGatewayList <sbc_domain> -Priority 1 -OnlinePstnUsages "TeamsVoice"
- Example:
New-CSOnlineVoiceRoute -Identity "Default Route" -NumberPattern ".*"-OnlinePstnGatewayList 31857.uctrunk.com -Priority 1 -OnlinePstnUsages "TeamsVoice"
- And the routing policy:
New-CSOnlineVoiceRoutingPolicy "VP-TeamsUser" -OnlinePstnUsages "TeamsVoice"
- Now assign the number and EnterpriseVoice to the user:
Set-CsPhoneNumberAssignment -Identity <user@domain> -PhoneNumber +<ddi> -PhoneNumberType DirectRouting
Set-CsPhoneNumberAssignment -Identity <user@domain>  -EnterpriseVoiceEnabled $true
- Example:
Set-CsPhoneNumberAssignment -Identity [email protected] -PhoneNumber +41582550840 -PhoneNumberType DirectRouting
Set-CsPhoneNumberAssignment -Identity [email protected]  -EnterpriseVoiceEnabled $true
Then finish the configuration with assigning the policy to the user:
Grant-CsOnlineVoiceRoutingPolicy -identity [username] -PolicyName "VP-TeamsUser"
- Example:
Grant-CsOnlineVoiceRoutingPolicy -identity [email protected] -PolicyName "VP-TeamsUser"
If you get an error, saying that the policy cannot be applied, this user needs to login one time into the team client
Set Teams as preferred calling client: (needed if account was migrated from Skype to Teams)
Get-CsOnlineUser <user>| Select Teams*
| TeamsMeetingPolicy | : |
| TeamsCallingPolicy | : AllowCalling |
| TeamsInteropPolicy | : DisallowOverrideCallingTeamsChatTeams |
| TeamsMessagingPolicy | : |
| TeamsUpgradeEffectiveMode | : Islands |
| TeamsUpgradeNotificationsEnabled | : False |
| TeamsUpgradePolicyIsReadOnly | : None |
| TeamsUpgradePolicy | : |
| TeamsCortanaPolicy | : |
| TeamsOwnersPolicy | : |
| TeamsMeetingBroadcastPolicy | : |
| TeamsUpgradeOverridePolicy | : |
| TeamsVideoInteropServicePolicy | : |
| TeamsWorkLoadPolicy | : |
Check and fix the Interop Policy & Calling Policy
Grant-CsTeamsUpgradePolicy -PolicyName DisallowOverrideCallingTeamsChatTeams -Identity <user@domain>
Grant-CsTeamsCallingPolicy -PolicyName AllowCalling -Identity <user@domain>
Example for how to set a specific user as Anonymous:
- Create an anonymous policy:
New-CsCallingLineIdentity -Identity Anonymous -Description "Anonymous policy" -CallingIDSubstitute Anonymous -EnableUserOverride $false
- Assign the policy to the user:
Grant-CsCallingLineIdentity -Identity "<user>" -PolicyName Anonymous
PowerShell Command for an overview of the configuration of a single user
Get-CsOnlineUser -Identity "<identity>" | Format-List -Property FirstName, LastName, EnterpriseVoiceEnabled, HostedVoiceMail, LineURI, UsageLocation, UserPrincipalName, WindowsEmailAddress, SipAddress, OnPremLineURI, OnlineVoiceRoutingPolicy
Other Information
How can a caller ID be used in your organization?
https://docs.microsoft.com/en-us/SkypeForBusiness/what-are-calling-plans-in-office-365/how-can-caller-id-be-used-in-your-organization
Setting the Caller ID for a user:
https://docs.microsoft.com/en-us/skypeforbusiness/what-are-calling-plans-in-office-365/set-the-caller-id-for-a-user
References
This How-To is based on a LinkedIn Webinar
You can find more info under the following link in Lesson 3:
https://www.linkedin.com/smart-links/AQEuYtcB_l4thA